Stage 1: The Security Segmentation Score
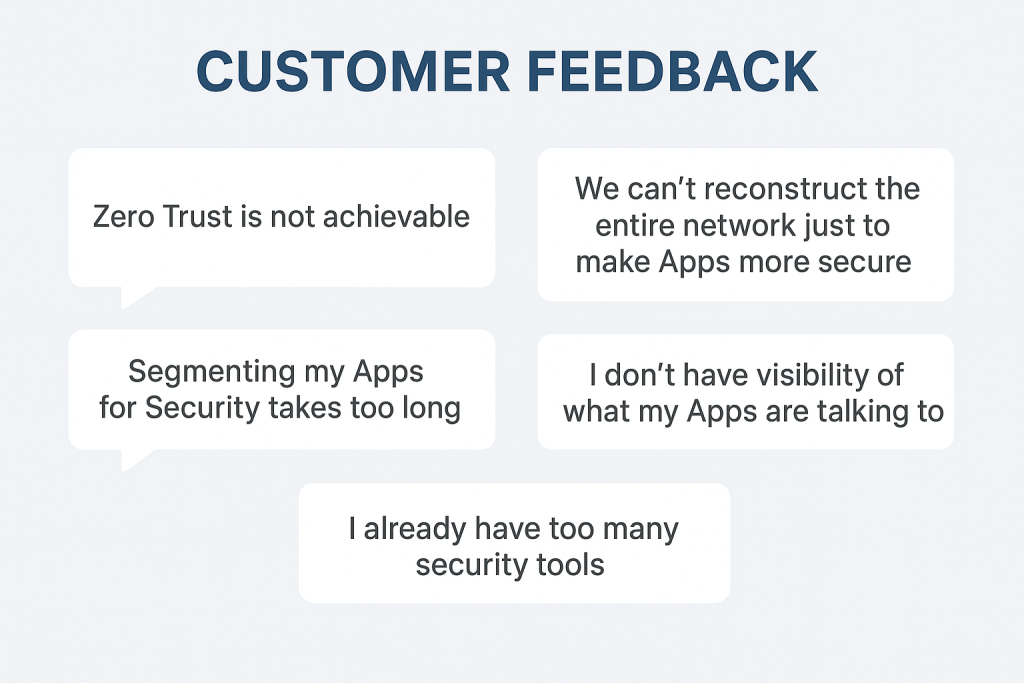
It happens every time I talk to a Security Team. Someone says something like “Zero Trust sounds great, but where do I even start without breaking the whole network?” It’s a valid fear. Most organizations are flying blind, guessing which firewall rules are actually doing work and which ones are just legacy clutter. If you want real results, you need trackable metrics. That’s why the first step of the vDefend Security Journey isn’t about writing rules—it’s about getting your Security Segmentation Score.
Not another score to track!
Stay with me here. The goal here isn’t to give your managers another metric to track how well you’re doing your job as a Security team.
Instead think of this as a “credit score” for your data center’s health. Instead of you manually auditing thousands of rows of spreadsheet data, the vDefend Security Services Platform (SSP) uses Security Intelligence to analyze your actual traffic flows (up to 30 days’ worth) and compares them against your existing Distributed Firewall (DFW) policies.
The result? A single number from 0 to 95 that tells you exactly how much of your environment is actually protected versus how much is sitting in an exposed “blast radius.”
Why not a 100? Because simply put, the only way to really get a 100 score on anything related to Security is either to turn off the VM, or Unplug it from the Network.
Let’s walk through the process together.
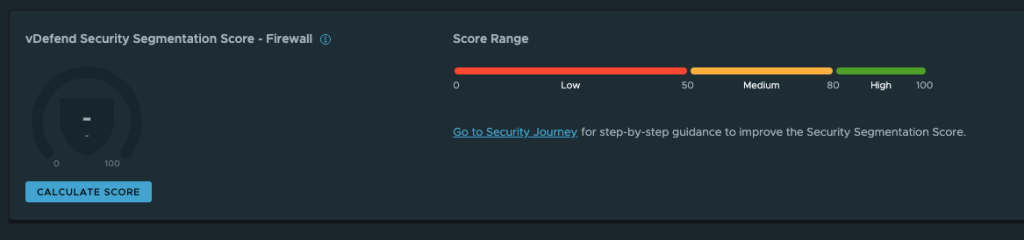
- Calculate Score : In the Security Services Platform on the “Monitor & Plan” tab overview section, click “Calculate Score”
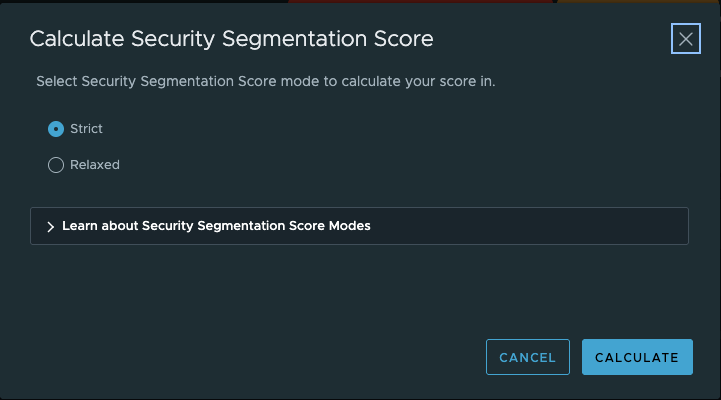
Noted in the UI is the following info about each mode.
Strict
“Customers looking for a score that accurately reflects their data center security posture should use Strict mode. This mode highlights achieved security while applying stricter penalties for any allowed unidentified traffic.”
Relaxed
“Customers creating security policies for their data center workloads may be cautious about denying traffic for fear of disrupting production applications. Relaxed mode emphasizes progress in rule creation rather than strict enforcement.”
I recommend running the Strict mode, at this point there is no actual enforcement happening so there is minimal risk to causing any harm.
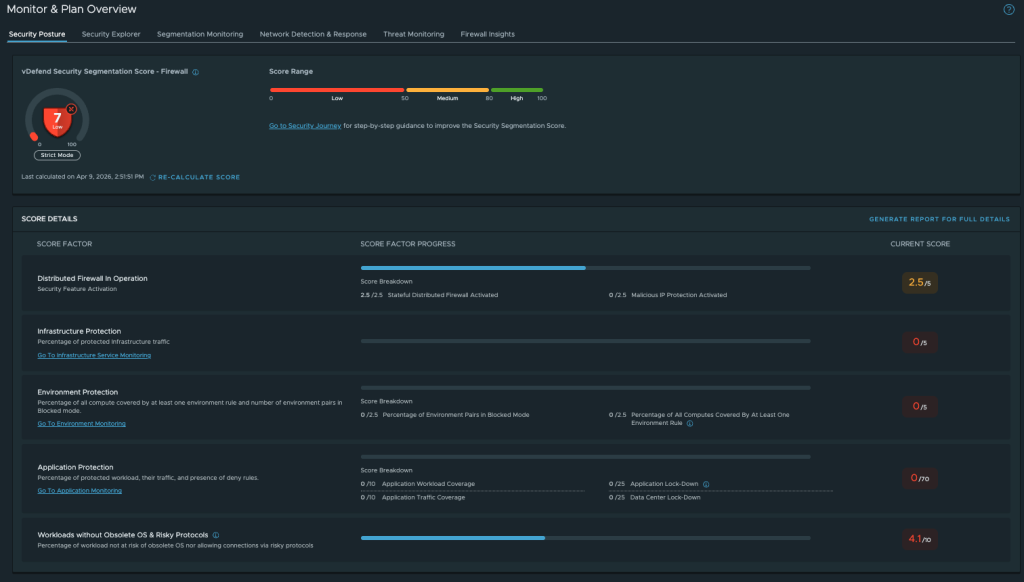
Now I’m already starting to see a picture of what I need to do in my environment to reduce my attack surface.
A few details to point out in the Image above.
Infrastructure Protection score is 0 because all infrastructure flows are currently unprotected.
Environment Protection score is 0 because no environment is defined yet.
Application Protection score is 0 because no applications are currently secured, and the datacenter is not locked down.
Security Segmentation Reports
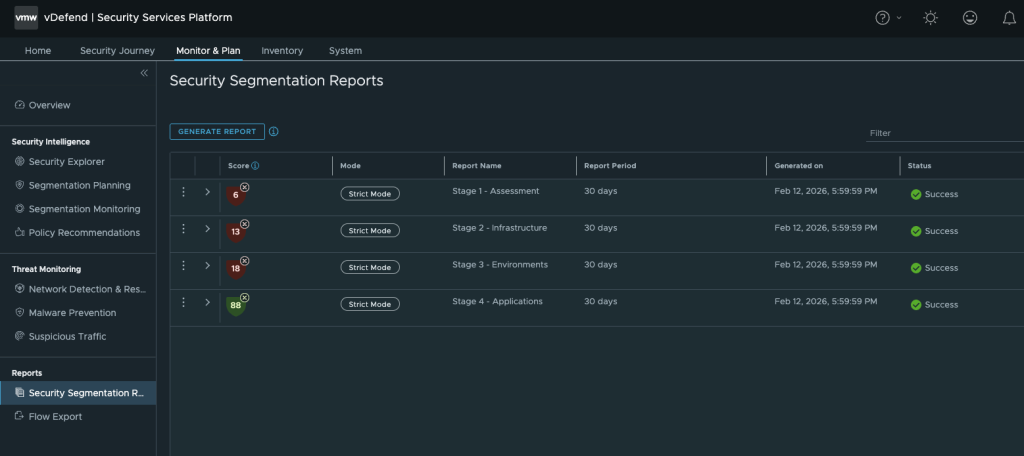
Sample Report
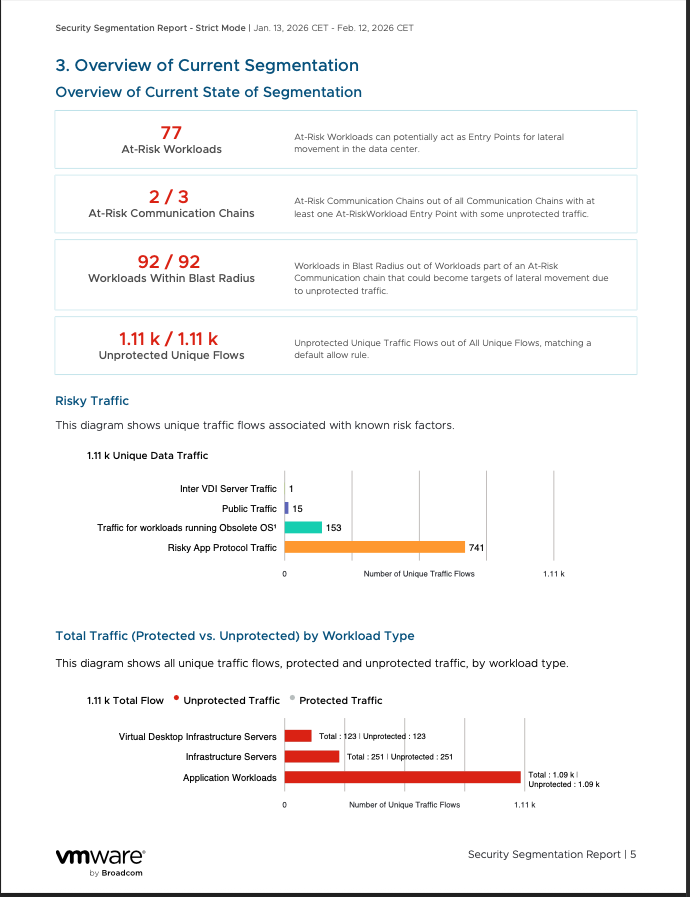
Breaking Down the Report: A Reality Check
When you pull your first Security Segmentation Report, don’t expect a gold star. In my recent assessment—run in Strict Mode over a 30-day period—the environment pulled a score of 6.
Why so low? Because in Strict Mode, the system doesn’t give you credit for “trying”; it only counts explicitly identified and secured traffic. Anything matching a “Default Allow” rule is a direct hit to your score.
The report looks at five core domains to see where you’re vulnerable. Here’s how my lab measured up:
- Infrastructure Protection (2.5/5): We have the Distributed Firewall and Stateful services activated, but we haven’t actually blocked the risky stuff yet.
- Environment Protection (0/2.5): Zero credit here. We haven’t defined “Production” vs. “Development” environments, so cross-contamination risk is at an all-time high.
- Application Workload Protection (0/25): This is the big one. We have 93 application workloads running, and 100% of that traffic is unprotected.
- Malicious IP Protection (0/5): We haven’t turned on the Malicious IP feeds yet, which is basically an “easy win” for the next stage.
Stage 1 Complete
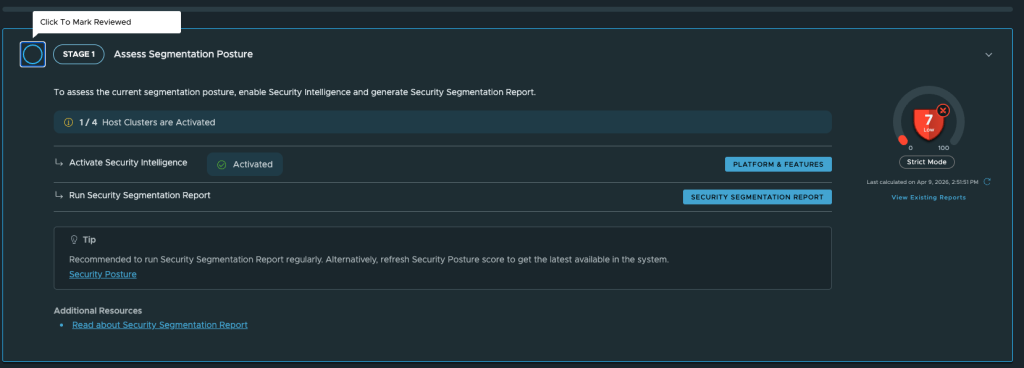
Congratulations, you’ve just completed the first step in the Security Journey. Now that we’ve assessed your environment we can move towards taking real steps to secure it.
This report is your prescriptive plan to locking down your Datacenter and preventing attacks.
-Britton Johnson | @vcixnv | VCIX-NV | VCP-VCF9
Written by me.